Copy text to clipboard using Powershell

In day-to-day life as an administrator, it is very common to copy and paste text between files, editors, etc.  There are a few features built into Windows and Powershell that can help make the copy pasta process easier.

The “clip” utility is a tool that has been built into Windows for a while now (I think since Windows 7), which allows you to redirect command output to the Windows system clipboard.  Pairing the clip tool with the capabilities of Powershell piping and you have a very nice way of getting text out of the shell and into a text editor, or wherever else you may want.

The following commands are simple and quick examples of how to pipe output text of a Powershell command to the clipboard.  You can use this method to output text from a file or from another Powershell command.

cat <file> | clip
Get-NetAdapater | clip

Then just hit CTRL+V in notepad (or your favorite text tool) and you will have the output of the previously clipped command.  In the above example, cat is just an alias for Get-Content in Powershell, carried over from the Linux and Unix shells.  Use the Get-Alias command to find at all of the various shortcuts for Powershell commands.

I tend to grab text out of files quite often, so writing out text to the clipboard and pasting elsewhere has saved me countless hours over the years of clicking around in GUI’s with a few keystrokes.  Shortcuts like this are often missed or over looked by admins that are used to point and clicking, so make sure you try it out if you haven’t discovered this trick.

Read More

Powershell for Linux!

Microsoft has been making a lot of inroads in the Open Source and Linux communities lately.  Linux and Unix purists undoubtedly have been skeptical of this recent shift.  Canonical for example, has caught flak for partnering with Microsoft recently.  But the times are changing, so instead of resenting this progress, I chose to embrace it.  I’ll even admit that I actually like many of the Open Source contributions Microsoft has been making – including a flourishing Github account, as well as an increasingly rich, and cross platform platform set of tools that includes Visual Studio Code, Ubuntu/Bash for Windows, .NET Core and many others.

If you want to take the latest and greatest in Powershell v6 for a spin on a Linux system, I recommend using a Docker container if available.  Otherwise just spin up an Ubuntu (14.04+) VM and you should be ready.  I do not recommend trying out Powershell for any type of workload outside of experimentation, as it is still in alpha for Linux.  The beta v6 release (with Linux support) is around the corner but there is still a lot of ground that needs to be covered to get there.  Since Powershell is Open Source you can follow the progress on Github!

If you use the Docker method, just pull and run the container:

docker run -it --rm ubuntu:16.04 bash

Then add the Microsoft Ubuntu repo:

# apt-transport-https is needed for connecting to the MS repo
apt-get update && apt-get install curl apt-transport-https
curl https://packages.microsoft.com/keys/microsoft.asc | apt-key add -
curl https://packages.microsoft.com/config/ubuntu/16.04/prod.list | tee /etc/apt/sources.list.d/microsoft.list

Update and install Powershell:

sudo apt-get update
sudo apt-get install -y powershell

Finally, start up Powershell:

powershell

If it worked, you should see a message for Powershell and a new command prompt:

# powershell
PowerShell
Copyright (C) 2016 Microsoft Corporation. All rights reserved.

PS />

Congratulations, you now have Powershell running in Linux.  To take it for a spin, try a few commands out.

Write-Host "Hello Wordl!"

This should print out a hello world message.  The Linux release is still in alpha, so there will surely be some discrepancies between Linux and Windows based systems, but the majority of cmdlets should work the same way.  For example, I noticed in my testing that the terminal was very flaky.  Reverse search (ctrl+r) and the Get-History cmdlet worked well, but arrow key scrolling through history did not.

You can even run Powershell on OSX now if you choose to.  I haven’t tried it yet, but is an option for those that are curious.  Needless to say, I am looking for the

Read More

Curl on Windows using a Docker wrapper

Does the Windows built-in version of “curl” confuse or intimidate you?  Maybe you come from a Linux or Unix background, and yearn for some of your favorite go-to tools?  Newer versions of Powershell include a cmdlet for interacting with the web called Invoke-WebRequest, which is useful, but is not a great drop in replacement for those with experience in non Windows environments.  The Powershell cmdlets are a move in the right direction to unifying CLI experiences but there are still many folks that have become attached to curl over the years, including myself.  It is worth noting that a Windows compatible version of curl has existed for a long time, however it has always been a nuisance dealing with the zip file, just as using SSH has always been a hassle on Windows.  It has always been possible to use the *nix equivalent tools, it is just clunky.

I found a low effort solution for adding curl to my Windows CLI flow, that acts as a nice middle ground between learning Invoke-WebRequest and installing curl binaries directly, which I’d like to share.  This alias trick is a simple way to use curl for working with API’s and other various web testing in Windows environments without getting tangled in managing versions, and dealing with vulnerabilities.  Just download the latest Docker image to update curl to the newest version, and don’t worry about its implementation across different systems.

Prerequisites are light.  First, make sure to have the Docker for Windows app installed (stable or beta are both fine) as well as a semi-recent version of Powershell.

Next step.  If you haven’t set up a Powershell profile, there are also lots of links and resources about how to do it.   I even wrote about it recently, so I am skipping that step as well.  Start by adding the following snippet to your Powershell profile (by default located in C:\Users\<user>\Documents\WindowsPowerShell\Microsoft.PowerShell_profile.ps1) and saving.

# Curl alias using docker
function Docker-Curl {
   docker run --rm byrnedo/alpine-curl $args
}

# Aliases
New-Alias dcurl Docker-Curl

Then source you terminal and run the curl command that was just created.

dcurl -h

One issue you might notice from the snippet above is that the Docker image is not an “official” image.  If this bothers you (security concerns, etc.), it is really easy to create your own, secure image.  There are lots of examples of how to create minimal images with Curl pre-installed.  Just be aware that your custom image will need to be maintained and occasionally rebuilt/published to guard against future vulnerabilities.  For brevity, I have skipped this process, but here’s an example of creating a custom image.

Optional

To update curl, just run the docker pull command.

docker pull apline-curl

Now you have the best of both worlds.  The built-in Invoke-WebRequest cmdlet provided by Powershell is available, as well as the venerable curl command.

My number one case for using curl in a container is that it has been in existence for such a long time (less bugs and edge cases) and it can be used for nearly any web related task.  It is also much handier to use curl for those with a background using *nix systems, rather than digging around in unfamiliar Powershell docs for similar functionality.  Having the ability to run some of my favorite tools in an easy, reproducible way on Windows has been a refreshing experience while sliding back into the Windows world.

Read More

Hide file extensions in PowerShell tab completion

One thing I have quickly discovered as I get acclimated to my new Windows machine is that by default the Windows Powershell CLI appends the executable file extension to the command that gets run, which is not the case on Linux or OSX.  That got me wondering if it is possible to modify this default behavior and remove the extension.  I’m going to ruin the surprise and let everybody know that it is definitely possible change this behavior, thanks to the flexibility of Powershell and friends.  Now that the surprise is ruined, read on to find out how this solution works.

To check which file types Windows considers to be executable you can type $Env:PathExt.

PS > $Env:PathExt
.COM;.EXE;.BAT;.CMD;.VBS;.VBE;.JS;.JSE;.WSF;.WSH;.MSC;.PY;.PYW;.CPL

Similarly, you can type $Env:Path to get a list of places that Windows will look for files to execute by default.

PS > $Env:PATH
C:\Program Files\Docker\Docker\Resources\bin;C:\Python35\Scripts\;C:\Python35\;C:\Windows\system32;C:\Windows;C:\Windows\System32\Wbem;C:\Windows\System32\WindowsPowerShell\v1.0\;C:\Program Files (x86)\NVIDIA Co
ram Files\nodejs\;C:\Program Files\Git\cmd;C:\Program Files (x86)\Skype\Phone\;C:\Users\jmreicha\AppData\Local\Microsoft\WindowsApps;C:\Users\jmreicha\AppData\Local\atom\bin;C:\Users\jmreicha\AppData\Roaming\npm

The problem though, is that when you start typing in an extension that is part of this path, say python, and tab complete it, Windows will automatically append the file extension to the executable.  Since I am more comfortable using a *nix style shell it is an annoyance having to deal with the file extensions.

Below I will show you a hack for hiding these from you Powershell prompt.  It is actually much more work than I thought to add this behavior but with some help from some folks over at stackoverflow, we can add it.  Basically, we need to overwrite the functionality of the default Powershell tab completion with our own, and then have that override get loaded into the Powershell prompt when it gets loaded, via a custom Profile.ps1 file.

To get this working, the first step is to look at what the default tab completion does.

(Get-Command 'TabExpansion2').ScriptBlock

This will spit out the code that handles the tab completion behavior.  To get our custom behavior we need to override the original code with our own logic, which I have below (I wish I came up with this myself but alas).  This is note the full code, just the custom logic.  The full script is posted below.

$field = [System.Management.Automation.CompletionResult].GetField('completionText', 'Instance, NonPublic')
$source.CompletionMatches | % {
        If ($_.ResultType -eq 'Command' -and [io.file]::Exists($_.ToolTip)) {
            $field.SetValue($_, [io.path]::GetFileNameWithoutExtension($_.CompletionText))
        }
    }
Return $source

The code looks a little bit intimidating but is basically just looking to see if the command is executable and on our system path, and if it is just strips out the extension.

So to get this all working, we need to create a file with the logic, and have Powershell read it at load time.  Go ahead and paste the following code into a file like no_ext_tabs.ps1.  I place this in the Powershell path (~/Documents/WindowsPowerShell), but you can put it anywhere.

Function TabExpansion2 {
    [CmdletBinding(DefaultParameterSetName = 'ScriptInputSet')]
    Param(
        [Parameter(ParameterSetName = 'ScriptInputSet', Mandatory = $true, Position = 0)]
        [string] $inputScript,

        [Parameter(ParameterSetName = 'ScriptInputSet', Mandatory = $true, Position = 1)]
        [int] $cursorColumn,

        [Parameter(ParameterSetName = 'AstInputSet', Mandatory = $true, Position = 0)]
        [System.Management.Automation.Language.Ast] $ast,

        [Parameter(ParameterSetName = 'AstInputSet', Mandatory = $true, Position = 1)]
        [System.Management.Automation.Language.Token[]] $tokens,

        [Parameter(ParameterSetName = 'AstInputSet', Mandatory = $true, Position = 2)]
        [System.Management.Automation.Language.IScriptPosition] $positionOfCursor,

        [Parameter(ParameterSetName = 'ScriptInputSet', Position = 2)]
        [Parameter(ParameterSetName = 'AstInputSet', Position = 3)]
        [Hashtable] $options = $null
    )

    End
    {
        $source = $null
        if ($psCmdlet.ParameterSetName -eq 'ScriptInputSet')
        {
            $source = [System.Management.Automation.CommandCompletion]::CompleteInput(
                <#inputScript#>  $inputScript,
                <#cursorColumn#> $cursorColumn,
                <#options#>      $options)
        }
        else
        {
            $source = [System.Management.Automation.CommandCompletion]::CompleteInput(
                <#ast#>              $ast,
                <#tokens#>           $tokens,
                <#positionOfCursor#> $positionOfCursor,
                <#options#>          $options)
        }
        $field = [System.Management.Automation.CompletionResult].GetField('completionText', 'Instance, NonPublic')
        $source.CompletionMatches | % {
            If ($_.ResultType -eq 'Command' -and [io.file]::Exists($_.ToolTip)) {
                $field.SetValue($_, [io.path]::GetFileNameWithoutExtension($_.CompletionText))
            }
        }
        Return $source
    }    
}

To start using this tab completion override file right away, just source the file as below and it should start working right away.

. .\no_ext_tabs.ps1

If you want the extensions to be hidden every time you start a new Powershell session we just need to create a new Powershell profile (more reading on creating Powershell profiles here if you’re interested) and have it load our script. If you already have a custom profile you can skip this step.

New-Item -path $profile -type file -force

After you create the profile go ahead and edit it by adding the following configuration.

# Dot source not_ext_tabs to remove file extensions from executables in path
. C:\Users\jmreicha\Documents\WindowsPowerShell\no_ext_tabs.ps1

Close your shell and open it again and you should no longer see the file extensions.

There is one last little, unrelated tidbit that I discovered through this process but thought was pretty handy and worth sharing with other Powershell N00bs.

Powershell 3 and above provides some nice key bindings for jumping around the CLI, similar to a bash based shell if you are familiar or have a background using *nix systems.

Powershell key shortcuts

You can check the full list of these key bindings by typing ctrl+alt+shift+? in your Powershell prompt (thanks Keith Hill for this trick).

Read More

Running containers on Windows

There has been a lot of work lately that has gone into bringing Docker containers to the Windows platform.  Docker has been working closely with Microsoft to bring containers to Windows and just announced the availability of Docker on Windows at the latest ignite conference.   So, in this post we will go from 0 to your first Windows container.

This post covers some details about how to get up and running via the Docker app and also manually with some basic Powershell commands.  If you just want things to work as quickly as possible I would suggest the Docker app method, otherwise if you are interested in learning what is happening behind the scenes, you should try the Powershell method.

The prerequisites are basically Windows 10 Anniversary and its required components; which consist of the Docker app if you want to configure it through its GUI or the Windows container feature, and Hyper-V if you want to configure your environment manually.

Configure via Docker app

This is by far the easier of the two methods.  This recent blog post has very good instructions and installation steps which I will step through in this post, adding a few pieces of info that helped me out when going through the installation and configuration process.

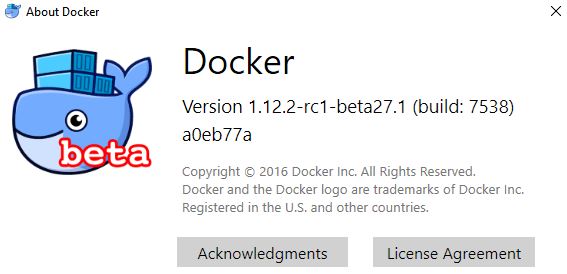
After you install the Win 10 Anniversary update, go grab the latest beta version of the Docker Engine, via the Docker for Windows project.  NOTE: THIS METHOD WILL NOT WORK IF YOU DON’T USE BETA 26 OR LATER.  To check, open your Docker app version by clicking on the tray icon and clicking “About Docker” and make sure it says -beta26 or higher.

about docker

After you go through the installation process, you should be able to run Docker containers.  You should also now have access to other Docker tools, including docker-comopse and docker-machine.  To test that things are working run the following command.

docker run hello-world

If the run command worked you are most of the way there.  By default, the Docker engine will be configured to use the Linux based VM to drive its containers.  If you run “docker version” you can see that your Docker server (daemon) is using Linux.

docker version

In order to get things working via Windows, select the option “Switch to Windows containers” in the Docker tray icon.

switch to windows containers

Now run “docker version” again and check what Server architecture is being used.

docker version

As you can see, your system should now be configured to use Windows containers.  Now you can try pulling a Windows based container.

docker pull microsoft/nanoserver

If the pull worked, you are are all set.  There’s a lot going on behind the scenes that the Docker app abstracts but if you want to try enabling Windows support yourself manually, see the instructions below.

Configure with Powershell

If you want to try out Windows native containers without the latest Docker beta check out this guide.  The basic steps are to:

  • Enable the Windows container feature
  • Enable the Hyper-V feature
  • Install Docker client and server

To enable the Windows container feature from the CLI, run the following command from and elevated (admin) Powershell prompt.

Enable-WindowsOptionalFeature -Online -FeatureName containers -All

To enable the Hyper-V feature from the CLI, run the following command from the same elevated prompt.

Enable-WindowsOptionalFeature -Online -FeatureName Microsoft-Hyper-V -All

After you enable Hyper-V you will need to reboot your machine. From the command line the command is “Restart-Computer -Force”.

After the reboot, you will need to either install the Docker engine manually, or just use the Docker app.  Since I have already demonstrated the Docker app method above, here we will just install the Docker engine.  It’s also worth mentioning that if you are using the Docker app method or have used it previously, these commands have been run already so the features should be turned on already, simplifying the process.

The following will download the engine.

Invoke-WebRequest "https://master.dockerproject.org/windows/amd64/docker-1.13.0-dev.zip" -OutFile "$env:TEMP\docker-1.13.0-dev.zip" -UseBasicParsing

Expand the zip into the Program Files path.

Expand-Archive -Path "$env:TEMP\docker-1.13.0-dev.zip" -DestinationPath $env:ProgramFiles

Add the Docker engine to the path.

[Environment]::SetEnvironmentVariable("Path", $env:Path + ";C:\Program Files\Docker", [EnvironmentVariableTarget]::Machine)

Set up Docker to be run as a service.

dockerd --register-service

Finally, start the service.

Start-Service Docker

Then you can try pulling your docker image, as above.

docker pull microsoft/nanoserver

There are some drawback to this method, especially in a dev based environment.

The Powershell method involves a lot of manual effort, especially on a local machine where you just want to test things out quickly.  Obviously the install/config process could be scripted out but that solution isn’t idea for most users.  Another drawback is that you have to manually manage which version of Docker is installed, this method does not update the version automatically.  Using a managed app also installs and manages versions of the other Docker productivity tools, like compose and machine, that make interacting with and managing containers a lot easier.

I can see the Powershell installation method being leveraged in a configuration management scenario or where a specific version of Docker should be deployed on a server.  Servers typically don’t need the other tools and should be pinned at specific version numbers to avoid instability issues and to make sure there aren’t other programs that could potentially cause issues.

While the Docker app is still in beta and the Windows container management component of it is still new, I would still definitely recommend it as a solution.  The app is still in beta but I haven’t had any issues with it yet, outside of a few edge cases and it just makes the Docker experience so much smoother, especially for devs and other folks that are new to Docker who don’t want to muck around the system.

Check out the Docker for Windows forums if you run into any issues.

Read More