This is a little bit of a follow up post to the origin post about generating certs with the DNS challenge. I decided to create a little container that can be used to generate a certificate based on the newly renamed dehyrdated script with the extras to make DNS provisioning easy.
A few things have changed in the evolution of Let’s Encrypt and its tooling since the last post was written. First, some of the tools have been renamed so I’ll just try to clear up some of the names if there is any confusion. The official Let’s Encrypt client has been renamed to Certbot. The shell script used to provision the certificates has been renamed as well. What used to be called letsencrypt.sh has been renamed to dehydrated.
The Docker image can be found here. The image is essentially the dehydrated script with a few other dependencies to make the DNS challenge work, including Ruby, a ruby script DNS hook and a few Gems that the script relies on.
The following is an example of how to run the script:
Just replace test.example.com with the desired domain. Make sure that you have the DNS zone added to route53 and make sure the AWS credentials used have the appropriate permissions to read and write records on route53 zone.
The command is essentially the same as the command in the original post but is a lot more convenient to run now because you can specify where on your local system you want to dump the generated certificates to and you can also easily specify/update the AWS credentials.
I’d like to quickly explain the decision to containerize this process. Obviously the dehydrated tool has been designed and written to be a standalone tool but in order to generate certificates using the DNS challenge requires a few extra tidbits to be added. Cooking all of the requirements into a container makes the setup portable so it can be easily automated on different environments and flexible so that it can be run in a variety of setups, with different domain names and AWS credentials. With the container approach, the certs could potentially be dropped out on to a Windows machine running Docker for Windows if desired, for example.
tl;dr This setup may be overkill for some, but it has worked out well for my purposes. Feel free to give it a try if you want to test out creating Certbot certs with the deyhrdated tool in a container.
There has been a lot of work lately that has gone into bringing Docker containers to the Windows platform. Docker has been working closely with Microsoft to bring containers to Windows and just announced the availability of Docker on Windows at the latest ignite conference. So, in this post we will go from 0 to your first Windows container.
This post covers some details about how to get up and running via the Docker app and also manually with some basic Powershell commands. If you just want things to work as quickly as possible I would suggest the Docker app method, otherwise if you are interested in learning what is happening behind the scenes, you should try the Powershell method.
The prerequisites are basically Windows 10 Anniversary and its required components; which consist of the Docker app if you want to configure it through its GUI or the Windows container feature, and Hyper-V if you want to configure your environment manually.
Configure via Docker app
This is by far the easier of the two methods. This recent blog post has very good instructions and installation steps which I will step through in this post, adding a few pieces of info that helped me out when going through the installation and configuration process.
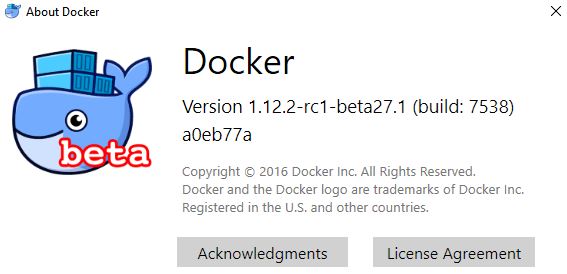
After you install the Win 10 Anniversary update, go grab the latest beta version of the Docker Engine, via the Docker for Windows project. NOTE: THIS METHOD WILL NOT WORK IF YOU DON’T USE BETA 26 OR LATER. To check, open your Docker app version by clicking on the tray icon and clicking “About Docker” and make sure it says -beta26 or higher.
After you go through the installation process, you should be able to run Docker containers. You should also now have access to other Docker tools, including docker-comopse and docker-machine. To test that things are working run the following command.
docker run hello-world
If the run command worked you are most of the way there. By default, the Docker engine will be configured to use the Linux based VM to drive its containers. If you run “docker version” you can see that your Docker server (daemon) is using Linux.
In order to get things working via Windows, select the option “Switch to Windows containers” in the Docker tray icon.
Now run “docker version” again and check what Server architecture is being used.
As you can see, your system should now be configured to use Windows containers. Now you can try pulling a Windows based container.
docker pull microsoft/nanoserver
If the pull worked, you are are all set. There’s a lot going on behind the scenes that the Docker app abstracts but if you want to try enabling Windows support yourself manually, see the instructions below.
Configure with Powershell
If you want to try out Windows native containers without the latest Docker beta check out this guide. The basic steps are to:
Enable the Windows container feature
Enable the Hyper-V feature
Install Docker client and server
To enable the Windows container feature from the CLI, run the following command from and elevated (admin) Powershell prompt.
After you enable Hyper-V you will need to reboot your machine. From the command line the command is “Restart-Computer -Force”.
After the reboot, you will need to either install the Docker engine manually, or just use the Docker app. Since I have already demonstrated the Docker app method above, here we will just install the Docker engine. It’s also worth mentioning that if you are using the Docker app method or have used it previously, these commands have been run already so the features should be turned on already, simplifying the process.
Then you can try pulling your docker image, as above.
docker pull microsoft/nanoserver
There are some drawback to this method, especially in a dev based environment.
The Powershell method involves a lot of manual effort, especially on a local machine where you just want to test things out quickly. Obviously the install/config process could be scripted out but that solution isn’t idea for most users. Another drawback is that you have to manually manage which version of Docker is installed, this method does not update the version automatically. Using a managed app also installs and manages versions of the other Docker productivity tools, like compose and machine, that make interacting with and managing containers a lot easier.
I can see the Powershell installation method being leveraged in a configuration management scenario or where a specific version of Docker should be deployed on a server. Servers typically don’t need the other tools and should be pinned at specific version numbers to avoid instability issues and to make sure there aren’t other programs that could potentially cause issues.
While the Docker app is still in beta and the Windows container management component of it is still new, I would still definitely recommend it as a solution. The app is still in beta but I haven’t had any issues with it yet, outside of a few edge cases and it just makes the Docker experience so much smoother, especially for devs and other folks that are new to Docker who don’t want to muck around the system.